Are you planning to learn how to ride a motorcycle? Right? For this, you probably went to a driving school to get the initial motorcycle driving skills and study the rules of the road in one go, for the subsequent receipt of a driving license of category “A” or “A1”? But for some reason, you also need additional knowledge and accessible, simple explanations that will help you learn how to drive a motorcycle quickly and easily? No problem. This article offers you a small “Step by Step” guide, with the help of which anyone can understand for themselves what you need to take to learn how to operate a motorcycle quickly.
A motorcycle, like a car, definitely attracts attention. Many of us, in our dreams, would like to master its management, but as usual, we mistakenly believe in advance that driving motor vehicles is quite difficult and very dangerous. But they are not at all like that. Everything is quite simple, you need to follow all precautions and, of course, the rules of the road, then the motorcycle itself will become no more dangerous for you than a car.
Still, a motorcycle is considered a high-risk vehicle that can easily get involved in an accident. Despite this, the guide will still help you to make the process of your initial learning how to ride motorcycle and getting the initial experience more pleasant and comfortable.
How to Ride Motorcycle
Step 1: Base
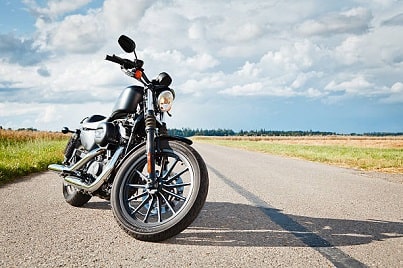
Let’s assume that you already know which type of motorcycle suits you best, and you have already received your first few lessons on driving a bike. Regardless of your training stage, remember to wear protective gear before riding. In addition to everything, getting behind the wheel of a motorcycle, you should also know that the equipment you trust with your life is completely in good condition.
For this reason, any owner of a motorcycle is obliged to periodically conduct a technical inspection and scheduled maintenance of their bike to identify all possible malfunctions in advance and in time.
Step 2: your safety
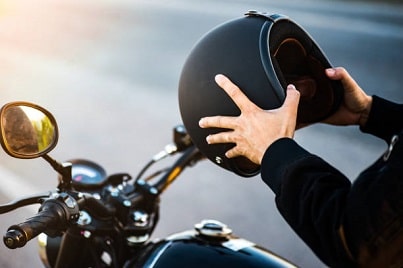
Sitting behind the wheel of any motor vehicle, you must certainly remember that you are not protected by anything while driving it in case of an accident. Therefore, you must always be as protected as possible with various equipment, which in the event of an accident will help you survive.
You should always be equipped with all protective equipment as much as possible, namely: gloves, helmet, special clothing, boots, etc., equipment.
After putting on everything you need for your safety, you can proceed to the next step.
Step 3: Boarding the motorcycle
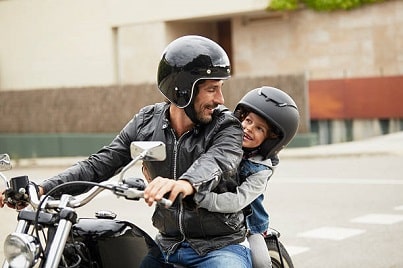
Depending on your height and the height of the bike, throwing one leg over the bike itself while boarding may not be very comfortable to start with, especially for many novice riders. Start doing this on the left side. Stabilize your balance by standing on your left foot, leaning against the gas tank, and transferring part of the body’s center of gravity to the steering wheel itself.
Next, lifting your right leg, start throwing it over the bike seat. When doing this, be careful not to lift your right leg too high; otherwise, you may lose your balance and fall with the motorcycle.
Step 4: Learn basic throttle/brake controls
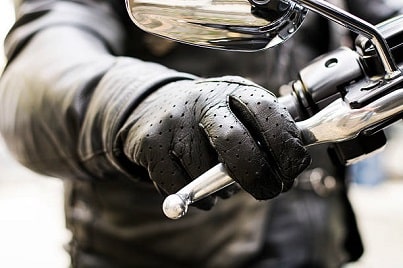
Your right hand at the motorcycle wheel is responsible for two essential functions: – acceleration and braking. When you twist the right handle on the motorcycle towards you (your wrist moves to the bottom), you add torque to the engine ( by analogy with a car – “press the gas pedal” ). True, it is worth noting the following right away: if you are a novice driver, then it takes some time to get used to the right throttle stick. At first, you will probably be doing a gas transfer to the engine, i.e., do not feel the proper level of the throttle itself on the motorcycle (i.e., the throttle stick).
Also, your right hand, in addition to adjusting the engine speed itself, is responsible for breaking the front brakes of the motorcycle (in the photo above, you can see the position of your right hand for the moment of braking).
By pulling the lever towards you, you can reduce the motorcycle’s speed or come to a complete stop. Here, as with a set of engine revs, smoothness and accuracy are also required to overdo it with the intensity of braking.
Please remember that if you push the front brake lever and overdo it with this pressing force, your motorcycle may lose traction and go into a skid.
Please note that most modern motorcycles are designed so that they no longer require a lot of effort when pressing the brake lever itself. Therefore, only the two-finger braking method can be used (pictured above). Nevertheless, friends, on some motor vehicles, everything remains as it was; that is, to press the front brake, you need to press (squeeze) the lever with all free fingers.
Your right foot is responsible for braking, but with the rear brake. You should be aware that the rear brakes become less effective if you use the front braking system (front brake). The point here is this: when braking with the front brake, the entire weight of the center of gravity immediately goes to the front of the motorcycle.
The rear braking system of a motorcycle is very useful in certain situations. For example, it is very convenient and safe to use the rear brake when maneuvering at low speed. Sometimes the rear brakes are much more effective than the front brakes (at any speed) if you are driving a “cruising motorcycle” in which all the bulk of the weight falls on its rear wheels.
The front brakes are needed to more effectively stop the motorcycle when, as with the help of the rear brake, you can only slightly reduce this speed if necessary.
Step 5: How to control the clutch
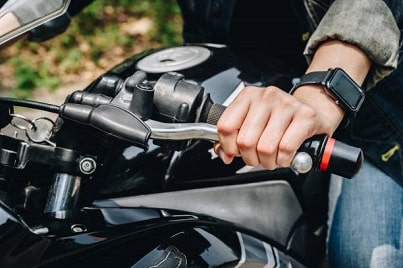
The clutch on a motorcycle and other motorcycles is on the left side of the left grip. Most sportbikes only need two fingers to push the clutch lever (at the top of the photo) when, like touring, cruising and other types of motorcycles, squeezing out the clutch requires the force of the entire hand.
The clutch on a motorcycle and a car is necessary to connect or disconnect the engine from the transmission. By pressing the clutch lever and turning it on, for example, at neutral speed, you completely disconnect the engine from the gearbox, which stops transmitting torque from the motor to the rear wheel. Further, by thus pressing the clutch and engaging the gear, we return the transmission of torque through the transmission to the motorcycle’s rear wheel.
Step 6: Shifting gears on the motorcycle
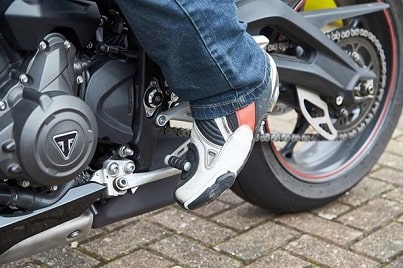
Gear shifting on a motorcycle is very different from the same cars. Despite the same principle of their work, the gear shifting itself occurs with the help of a foot lever, which moves with the left foot. Here are dear friends an ordinal list of these gears in most motorcycles (i.e., in order):
- 6th gear (not available in all motorcycles)
- 5th gear;
- 4th gear;
- 3rd gear;
- 2nd gear;
- NEUTRAL POSITION;
- 1st gear.
The overwhelming majority of motorcycles and other motor vehicles use the above transmission order. Usually, they are called shortly, like this: – “1st gear – down, 5th gear up”. This is the easiest way to remember where to push the gear lever to engage the required speed.
To find a neutral position naturally with the left foot (in this position, torque is no longer transmitted to the rear wheel ) may take some time. First, you need to get used to doing everything quickly and on a subconscious level.
It is also worth noting that some motorcycle models allow automatic engagement of neutral in the gearbox when the clutch lever is pressed. Also, when changing gears on most motor vehicles, exactly the speed you turned on is displayed on the dashboard.
And yet, when you turn on the neutral position on many motorcycles, you can contemplate (see) in front of you that it is the neutral gear that is engaged (the neutral gear is indicated by the letter “N,” it is highlighted in green).
Gear shifting occurs in the following order:
- Press the clutch handle with your left hand
- Include the necessary gear (with the help of the left foot).
- Smoothly release the clutch by smoothly turning the throttle handle towards you (right wrist down)
Please remember that at each speed, you should not accelerate above specific set values. To make it easier to understand when you need to turn on a different rate, you must first learn to feel the engine’s work. For example, if the motorcycle engine starts to overstrain at a certain speed, you need to change the speed immediately. In addition, if you are not driving on a highway but a rough or dirt road, then you have no reason to spin the engine to too high revs.
If, at the initial stage, the whole process of gear shifting seems to you rather complicated, especially when you start driving, then try not to worry; everything will come to its senses. This whole process is much easier than it first seems. You need to get used to the order of gear shifting, and then it will be obtained automatically.
Step 7: Starting the motorcycle engine
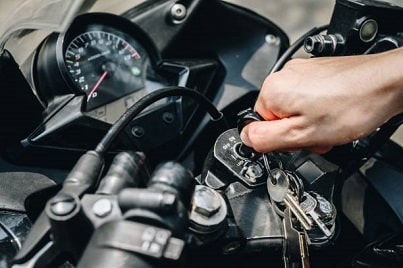
Now, you are familiar with all the basic controls for motor vehicles; it’s time to start driving. To do this, first, start the motor vehicle engine. Nowadays, almost most motorbikes are equipped with an electric engine starting system.
Know friends, if the position of the ignition switch is off, then turning the ignition key on the motorcycle will not start.
Therefore, remember, before starting the motorcycle engine, please do not forget to press the “Enable” button (pictured). This switch is found on the right side of many motorcycles. It is easily pressed with your right thumb.
Now turn the key to the “Ignition” position as shown in the photo at the bottom. Usually, to turn the key to the “ignition” position, it is necessary to turn it to the right side. Most modern motorcycles, after this step, begin immediately to conduct a self-test, precisely to make sure that all the sensors in the bike are functioning.
If during a self-test you see that the arrows of the speedometer and tachometer first went up and then dropped to zero, please do not worry; this is normal.
When the self-test is completed, ensure that the transmission is neutral (on the instrument panel lights up green – “N”).
Then, with the thumb of your right hand, you need to press the start button, which is usually located below the ignition switch itself and is indicated by the “lightning and circular arrow” logo.
Many motorcycles will immediately require you to release the clutch to start the engine. This is done primarily to prevent uncontrolled motorcycle movement if the driver has forgotten to put the motorcycle (gearbox) in neutral.
Then, by pressing the start button, the motorcycle engine will start.
Some carbureted motorcycles require the driver to press the throttle to pump fuel into the cylinders before starting the same engine. But most modern motorcycles no longer require the throttle itself to be used to start the engine.
After starting the motorcycle, you need to wait for a little while before enjoying the further ride and comprehending the new world of motorcycle culture.
Step 8: Warm up the motorcycle engine
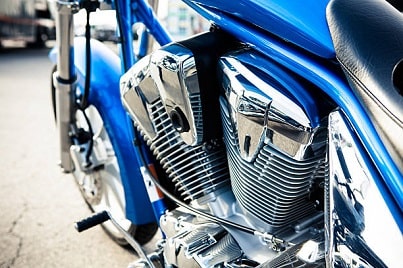
Any internal combustion engine achieves optimal performance only after thoroughly warming up and reaching its operating temperature. True, in the automotive world, the practice of warming up the motor is almost a thing of the past today.
Most modern cars today also do not require warming up the engine, since after its start, further work is already controlled by complex computer systems of the car and electronic sensors. However, motorcycle engines still require preheating today before riding, especially if the motorcycle is equipped with a carburetor. If motor vehicles are equipped with electronic fuel injection, the engine warming up itself requires much less time.
After starting the engine, let it idle a little, at least 45 seconds to several minutes. Try to avoid high engine speeds, as, on a cold power unit, engine oil cannot quickly distribute in all its moving parts.
True, the very time required to warm up the engine will vary from various factors, ranging from the same external ambient temperature and the engine volume itself and ending with the power of the power plant itself and the type of oil used.
To understand when the engine temperature has reached a standard value, to start driving, please use a temperature sensor that will show you the temperature of the engine.
Step 9: Remember to remove the footrest before driving
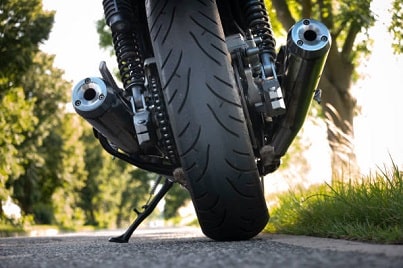
Most modern motorcycles have a safety feature that prevents movement on the motorbike with the kickstand raised. That is, if you forgot to remove the footrest from under the bike after starting the engine, the electronic system would automatically turn off the ignition.
If your motorcycle equipment is not equipped with such equipment, before starting the movement itself, do not forget to check whether you have removed this stand mechanism several times. To remove the stand mechanism, fold it with the movement of your left foot.
Step 10: Start moving
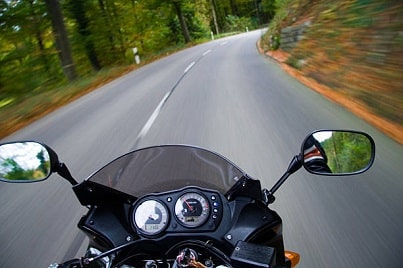
After you have studied the necessary steps (actions) from No. 1 to 9 and all the equipment systems are in good working order, we can say that everything is ready to start moving. In this stepping action, you should recall the functions of the throttle grip, how the front and rear brakes work, how the clutch and foot-shift lever works, and how to smoothly release the clutch lever while simultaneously turning the throttle.
Please pull the clutch lever towards you. Push the footswitch down to put the transmission itself in first gear. Then release the clutch pedal smoothly and slowly; you will immediately feel how the motorcycle begins to move smoothly.
A little twisting of the throttle grip (wrist down) will help keep the motorcycle from stumbling. Once the bike has enough momentum to keep it from falling onto its side, you can place both feet on the footpegs.
After you set off and put your feet on the footpegs, congratulations. You ride a motorbike yourself.
Most novice motorcycle riders encounter cornering problems while driving. The same happens on a bicycle when driving more than 15 km / h. To turn in the desired direction, you need to firmly press the steering handle from the side to which you need to turn. In this case, you must also bend in the direction in which you want to turn.
Motorcycle theory by theory and practice has not yet been canceled, and no one will replace it. Driving a motorcycle is more accessible than the same description of this very technique for driving a bike. Therefore, remember, when you are driving a motorcycle, you must trust your instincts and learn to feel your vehicle.
Changing the gears themselves, described in step # 6, will require some practice and habits from you. We describe braking and operation with the throttle stick in step # 4. These actions will also need some practice from you, which you can quickly learn on-site at the same driving school.
But they are not the most important thing for safe driving. The main task of safety is competent maneuvering on the road and the smoothness of all your actions while driving this motorcycle. If you are a novice driver, then you should not immediately aim for high speed. This training should be gradual and sequential; it will allow you to maintain maximum safety while driving the motorcycle and reliably consolidate the acquired skills throughout your training.
Obtaining a License to Drive after Training
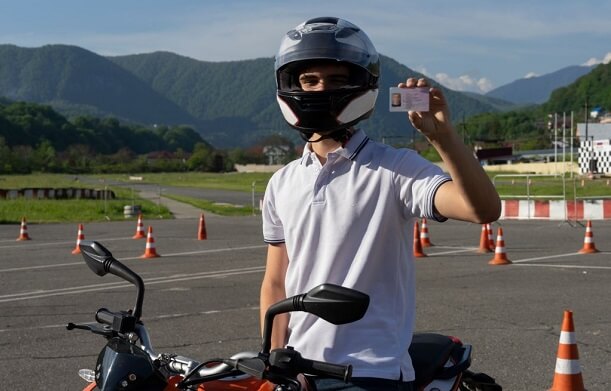
If you only need a motorcycle to go for a weekend ride in the immediate vicinity, you can learn how to drive it yourself with the help of more experienced friends. But if your intentions are more serious, then your training should take place under the guidance of a professional coach.
If you are already sixteen and have no medical contraindications, you can safely undergo motorcycle driving training. To do this, you go through theoretical studies and practical ones. The motorcycle school will help you study the structure of your bike, understand the rules of the road, and teach the rules of first aid.
Practical exercises will be held in the open areas to acquire the necessary skills to operate your motorcycle. Modern city streets are so busy that management will require the proper skill from you. Under the guidance of a knowledgeable person, it will help you feel more confident and calm on the road or track.
How do I get a motorcycle license? This is done after completing the training.
The first step is to collect the necessary documents.
- Fill out an application to your district traffic police on letterhead.
- At the end of the motorcycle school, attach a training certificate, otherwise fill out the driver’s examination card.
- A medical certificate, where the marks of all doctors must be
- Prepare two photographs in advance
- A document that will confirm your identity and registration
- You will need to pay the exam fee and present a receipt for payment.
You will have to pass a theoretical exam first. In case of successful passing, within three months after that, you pass the practical part of the exam. After completing all the tests, you get the license to drive a motorcycle.
Motorcycle driving technique
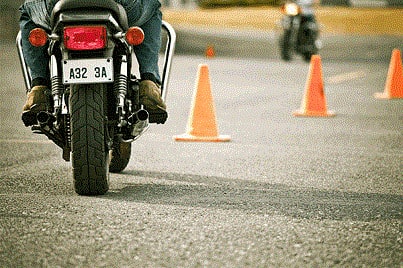
You need to learn from simple to complex. Accordingly, having learned how to get underway and stop, you can move on to more complex tasks. Correct gear shifting, turning, turning, various types of braking, setting a gaze – all these and other driving elements are first practiced many times at a low safe speed.
Learning should be gradual and consistent. This will maintain maximum safety while driving the bike and reliably reinforce the skills learned in the learning process. To feel safe on public roads, studying at a motorcycle school is imperative and strictly following all the exercises and instructor’s requirements. And then the motorcycle will become your reliable friend for a long, happy time!
Latest Reviews
- Best Brake Pads for Harley Davidson Touring
- Best Bicycle Horns
- Best Bike Grease
- Best Motorcycle Boots & Riding Shoes Reviews
- Firmstrong vs Sixthreezero
- 10 Best Dual Sport Tires for 2023 – Reviews And Buying Guide
Helmet Guides
- Top 7 Best Bicycle Helmet Mirror Reviews
- Top 10 Best Airsoft Helmet Reviews
- Top 10 Best Bluetooth Motorcycle Helmet Speakers Reviews
- Best Motocross Helmet For 2023 – Reviews And Buying Guide
- Best Motorcycle Helmet Brands On The Market You Should Know
- Top 10 Best Snowmobile Helmet – Reviews And Buying Guide
