For a motorcycle that you use for daily use to commute to work and back home, it is likely to develop some dirt in the gas tank. Things such as sediments, debris and rust are likely to find their way into the gas tank. You will have to think about the removal of such contaminants that will affect fuel quality.
With cleaning now in your mind, you have to think of ways on how to clean a gas tank. A couple of methods exist, we get to look at a few and their applications. These methods are cheap, so do not worry about spending much on the cleaning process.
Impacts of Gas Tank Rust’s
The rust in your gas tank can have a devastating effect on not only how much you enjoy driving, but also the safety of those around you. The negative impacts include things like decreased accuracy and fuel consumption as well as reduced engine power output that could lead to accidents or even death if something isn’t done about it soon enough.
The rust in your gas tank is more than just an annoyance for bikers – it’s dangerous! From being less safe behind the wheel from increased risk of bike crashes to having trouble starting when summer finally arrives, there are plenty reasons why we should take care of this issue before symptoms become severe.
Negative impacts-
- You’re a rider, and if you have an inconsistent fuel flow it can affect your acceleration as well as keep your vehicle at the wrong idling state.
- What could happen when your fuel filters are plugged up?If you don’t make sure to clean out the dirt and grime from your gas tank, it can cause a buildup that will lead to pressure or even worse.
- The heat, friction and air particles inside an engine can all affect the way that fuel burns. When rust forms in the inner workings of a bike’s engine it cuts off oxygen for combustion causing emissions to rise.
How to Clean a Motorcycle Gas Tank- Inside and Out Cleaning
Method 1: Inspection And Cleaning Of The Gas Tank

The fuel tank is supposed to last a lifetime of the motorcycle, so it is the reason you have to take good care of it. Without the proper maintenance, you might just end up having to replace the whole fuel tank, which is often expensive.
With this method, anyone can check for any signs of corrosion and dirt in the gas tank before cleaning.
What You Will Need
- Flashlight
- Gloves
- Goggles
- Cleaning solution
- Socket set
- Brush
Instructions
Step 1: Inspect The Gas Tank
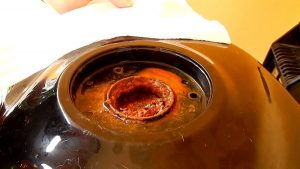
With your flashlight, check the interior of the gas tank to see if it is clean. You are likely to see some debris or rust in the fuel tank if it has been a while since the last cleanup.
It is not just about the interior, also check the exterior to see if the tank has been spared by the road damage. Sometimes you might end with a tank more damaged on the outside than inside. Which is commonly the case.
Step 2: Unscrew The Gas Tank
Once you have seen the condition of the gas tank, you would commonly understand whether to clean it or not. At this point, we assume it needs some cleaning, so you have to unscrew it from its place for the process to start.
It would always be easier to clean the gas tank if it is not still on the motorcycle. Using the socket set, use the appropriate tools to remove the gas tank from the motorcycle. Do it carefully, especially if you have a lot of fuel still in it.
-Socket set-
Step 3: Drain The Tank
Once you have removed the tank from the motorcycle, it is the time that you removed all the fuel in it before you can start with the cleaning. Drain the fuel into an approved container so that you can still be able to reuse the same fuel later on after cleaning is done.
Some containers for storing fuel would come with a filter that helps eliminate the debris and rust. The next time you top up the fuel tank using the same fuel, it will not have any issues such as the debris and rust.
Step 4: Start With The Outside
It is common to find that the exterior of the gas tank would not always be clean. It would need some work before you can start cleaning the interior. Since the surface would always be exposed, you can expect to find some surface rust and debris.
With your cleaning solution and brush, it should be easy to handle the dirt on the exterior of the gas tank. With a few minutes of scrubbing and rinsing, you should now have a clean exterior. It would be time now to tackle the dreadful interior.
Step 5: Clean And Flush The Tank With Water
Water is often the best cleaning agent you can get to use in your gas tank. The work of the water would be to remove some of the loose debris and sediments before you get to clean the rust later.
Pour enough water into the tank for the cleaning process. You can now swish the water around in a circular motion to dislodge as many debris and surface rust as possible. The debris will now settle at the bottom once you stop swirling the gas tank.
Proceed to pour these contents in a container, and you will see most of the debris come out with the water. Tap at the bottom of the tank to remove any remaining debris inside.
Step 6: Use A Cleaning Solution Of Your Choice
For the cleaning solution, it can vary from homemade to commercial. The trick is to ensure you get the right cleaning solution at all times. For this case, we can use dish soap and water. The resulting cleaning solution will help in removing rust and other sediments from the tank.
It might get tricky cleaning the modern fuel tanks as they might have internal baffling as a way of reducing the rocking motion. To remove the debris easily, you will have to clean the tank with high-pressure soap water.
That pressure combined with the cleaning capabilities of soap, you can have most of the debris removed. You should rinse the tank with clean water to make sure that no excess soap stays in the gas tank.
Step 7: Drying
It would only be logical if you let the tank to dry before you can install it back in its position. There are many ways of drying the tank. You could leave it out in the summer sun or use compressed air to dry it fully. You can always opt for the compressed air method if the sun is not showing up anytime soon such as the winter.
Step 8: Reinstallation
Before you can reinstall the gas tank, a last inspection is often recommended. You will be checking for any serious signs of rust or leaks. With your flashlight, check to see if the interior is now in a better condition than when you first took it out of the motorcycle.
If the tank shows that the damage is excess, the best thing to do is just replace it. It might work for a while, but it would often end up being a disaster.
If everything is okay, you can easily bolt it back into position using the socket set.
Check out this video for more tips on how to clean a gas tank:
Method 2: Using Electrolytic Solution

This method is important for removing rust from the interior of a gas tank. If you were looking for an alternative method, then this should be it.
What You Will Need
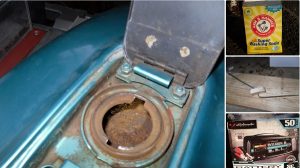
- Water
- Bucket
- A batterry charger
- Scap wood
- Sacrificial anode made of steel
- Washing soda
Instructions
Step 1: Sacrificial anode
The sacrificial anode is essential to the process of storing gas. The rod must be suspended by a wood collar inside your tank, but it can’t come into contact with any metal or other substances that will corrode and pollute fuel over time. If you use stainless steel for this purpose, toxic compounds are sure to form!
In order to suspend the rod inside of the tank, I fashioned a collar made out of wood scrap. The top part is bent over so as not to slide into contact with water and bottom bend was put in place for clearance between it and other objects on either side.
Step 2: Electrolytic Solution
Fill up your bucket or container big enough to fit your entire gas tank (something like an oatmeal tub) with water. Then add 1 tablespoon for every gallon you need cleaned out from the inside of it- so if there’s 3 gallons worth of old fuel mixed together, use 3 tablespoons total). Stir thoroughly until all soda has dissolved into the water before topping off any holes on the bottom part where petcocks would normally be attached.
Step 3: Hook It All Up
First, attach the negative lead from your battery charger to a tank and then connect it with a positive (or sacrificial) anode using copper wire or other conductive materials that won’t corrode in water like stainless steel clamps or nylon straps. Turn on the charger which should be set at 10 amps for this first time around (50 amp will cause overheat). Leave them connected while checking up every 8-to10 hours until you notice change in coloration revealing that all corrosion has been removed along with any traces of metal plating left behind
Rust Is Removed
As much as it is supposed to take 10 hours, you are to keep on having a check-in every hour. You will have to remove the anode from the tank and remove the accumulated rust on it. After cleaning, you get to place the anode back in position and turn on the charger again.
Once the rust is removed, you can now rinse your tank to remove the soapy water.
And below is a video with some tips on handling this procedure
Summary
The two methods seem easy enough for anyone looking to make the best out of cleaning a gas tank. As you can see, they can all be done at home without much need of a garage. This could save you a lot of money if do it yourself at home.
You can always post some comments of what you think about the guide and also share the same article with your friends too on social media.

